Object Recognition Using Linemod
Linemod is a pipeline that implements one of the best methods for generic rigid object recognition and it proceeds using very fast template matching. For more information, check the LINE-MOD approach from http://ar.in.tum.de/Main/StefanHinterstoisser.
Through this tutorial, you will:
- learn how to use the linemod pipeline to learn objects
- learn how to use the linemod pipeline to detect objects
- use the ORK RViz plugins
Setup the working environment
Hardware
- To see Linemod in action, we will need to have
- a 3D camera (such as a Kinect or a Xtion),
- a PC with ROS installed,
- and optionally, some CAN to test the object detection
Software
You need to have ORK installed on the computer. Installation of ORK is quite easy and clearly explained in here. We need rqt_reconfigure and RViz to configure the 3D camera and visualize the detected objects. To install those tools, just run the following command:
sudo apt-get install ros-<your ROS distro>-rviz ros-<your ROS distro>-rqt_reconfigure ros-<your ROS distro>-openni*
Configuring the 3D camera and RViz parameters
At first, launch the OpenNI driver:
roslaunch openni2_launch openni2.launch
Run RViz
rosrun rviz rviz
Set the Fixed Frame (in Global Options, Displays window) to /camera_depth_optical_frame. Add a PointCloud2 display and set the topic to /camera/depth/points. This is the unregistered point cloud in the frame of the depth (IR) camera and it is not matched with the RGB camera images. For visualization of the registered point cloud, the depth data could be aligned with the RGB data. To do it, launch the dynamic reconfigure GUI:
rosrun rqt_reconfigure rqt_reconfigure
Select /camera/driver from the drop-down menu and enable the depth_registration checkbox. In RViz, change the PointCloud2 topic to /camera/depth_registered/points and set the Color Transformer to RGB8 to see both color and 3D point cloud of your scene. The detailed explanation can be found here: http://wiki.ros.org/openni2_launch.
Object detection
Setup the object database
The Object Recognition Kitchen manages objects using couchDB database. Thus, in order to learn objects, you need to store their 3D models in the database first. You can check the detailed DB tutorial or the following brief explanation.
When you install ORK, the database is empty. Luckily, ORK tutorials comes with a 3D mesh of a coke that can be downloaded here:
git clone https://github.com/wg-perception/ork_tutorials
You can upload the object and its mesh to the database with the scripts from the core:
rosrun object_recognition_core object_add.py -n "coke " -d "A universal can of coke"
rosrun object_recognition_core mesh_add.py <YOUR_OBJECT_ID> <path to ork_tutorials/data/coke.stl>
Once uploaded, you can then check the object in the database by going to http://localhost:5984/_utils/database.html?object_recognition/_design/objects/_view/by_object_name
Training
Now, you can learn objects models from the database. Execute the Linemod in the training mode with the configuration file through the -c option. The configuration file should define a pipeline that reads data from the database and computes objects models.
rosrun object_recognition_core training -c `rospack find object_recognition_linemod`/conf/training.ork
Detection
Once learned, objects can be detected from the input point cloud. In order to detect object continuously, execute the Linemod in the detection mode with the configuration file that defines a source, a sink, and a pipeline, as explained in http://wg-perception.github.io/object_recognition_core/detection/detection.html.
rosrun object_recognition_core detection -c `rospack find object_recognition_linemod`/conf/detection.ros.ork
Visualization with RViz
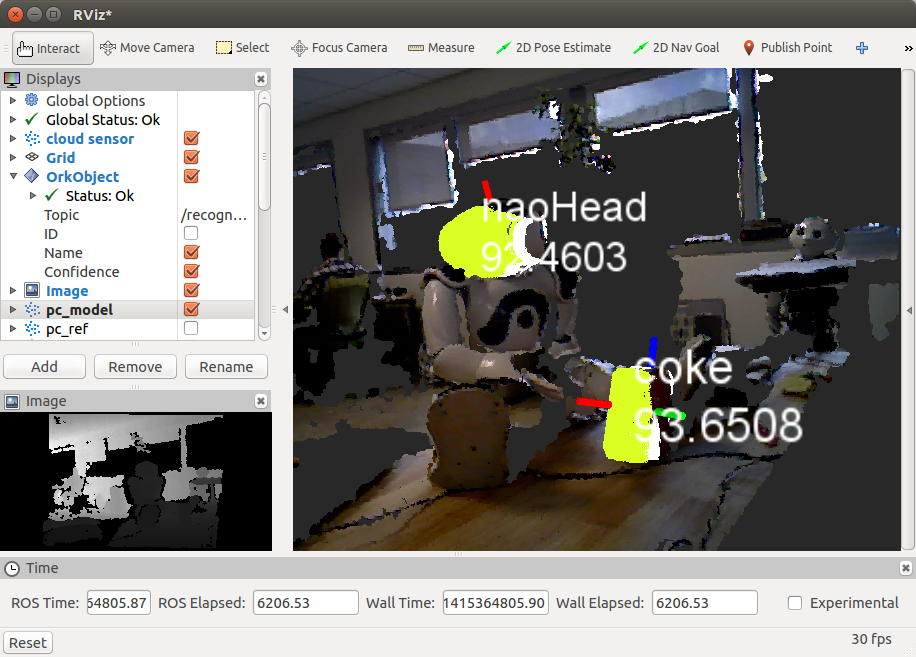
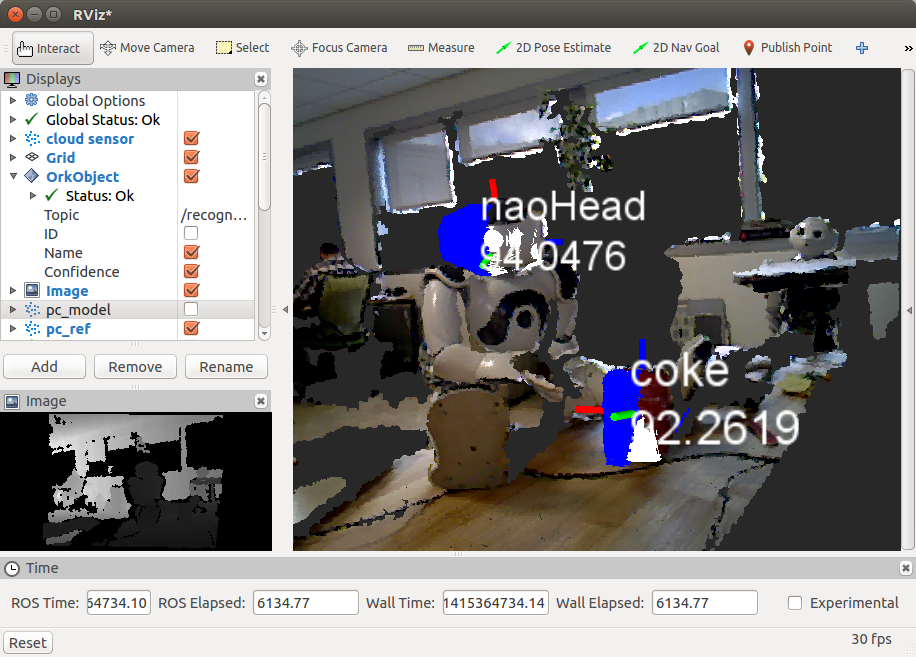
Now, go to RViz and add the OrkObject in the Displays window. Select the OrkObject topic and the parameters to display: object id, name, and confidence. Here, we show an example of detecting two objects (a coke and a head of NAO) and the outcome visualized in RViz:

For each recognized object, you can visualize its point cloud and also a point cloud of the matching object from the database. For this, compile the package with the CMake option -DLINEMOD_VIZ_PCD=ON. Once an object is recognized, its point cloud from the sensor 3D data is visualized as shown in the following image (check blue color). The cloud is published under the /real_icpin_ref topic.
For the same recognized object, we can visualize the point cloud of the matching object from the database as shown in the following image (check yellow color). The point cloud is created from the mesh stored in the database by visualizing at a pose returned by Linemod and refined by ICP. The cloud is published under the /real_icpin_model topic.